


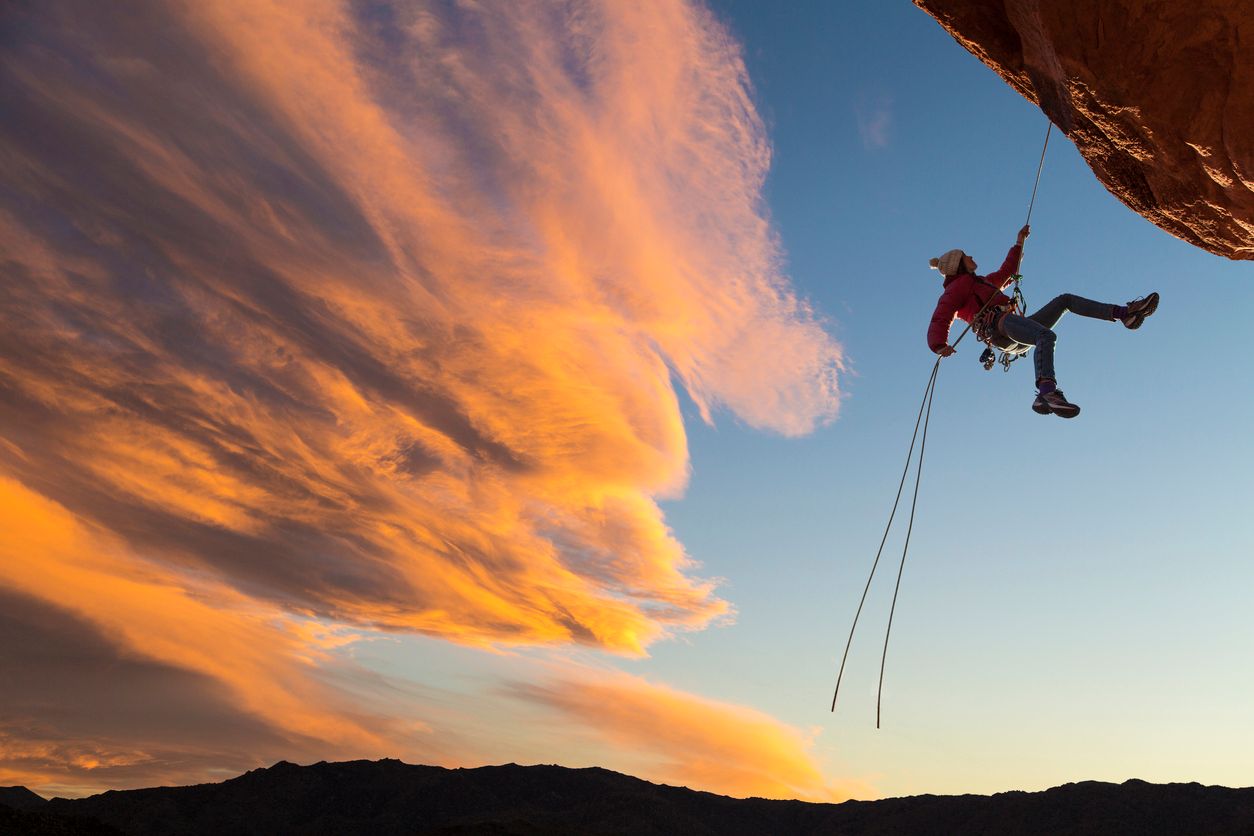
Abseiling is basically the opposite of climbing. If rock climbing is going up a near-vertical face using a rope, then abseiling is going down a near-vertical face using a rope. Although we call it abseiling in the UK, it’s often known as rappelling in Europe and the US, from the French word rappeler. It’s a really useful technique to learn, whether you’re going to use it as part of rock climbing, mountaineering – or just to be able to walk down a really big cliff face one day.
What is Abseiling?
Abseiling is basically controlled falling. We understand if that’s probably not what you wanted to hear, though, so let’s go into a bit more detail! Abseiling is a way of descending something using a rope – whether that something is a rock face you’ve climbed or a skyscraper you’re cleaning windows on. It’s a fast, controlled and (relatively speaking) safe way to get down. Just like climbing, how safe it is depends on what sort of protection you put in place. We’ll talk a bit more about that later.
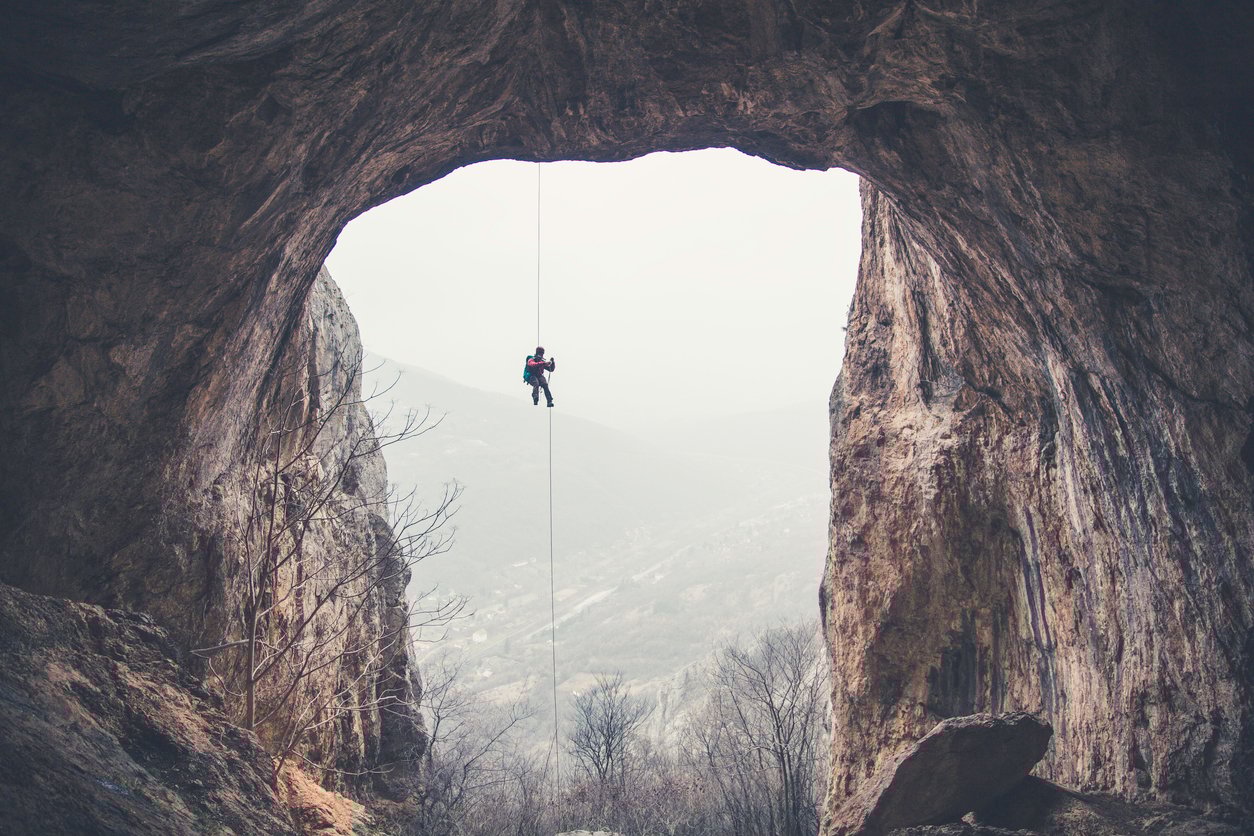
Typically in the outdoors, you would use abseiling to get down something you’ve already climbed. It might be going straight back down the same rock face you’ve just climbed up, or down the other side of the mountain over steep terrain you haven’t seen before. It might also be useful to lower you down into a hole, cave or crevasse – think Mission Impossible. In these cases abseiling is just one skill in your armoury that you’ll use when it’s needed.
But, abseiling is also a sport in its own right. People lower themselves down 40ft cliffs for fun… yes, for fun. You can abseil down gorges, waterfalls, quarries – or do the longest abseil in the UK from a tower next to the Olympic Stadium.
How does Abseiling Work?
You’ve already got that abseiling is all about going down something steep in a controlled manner. Next, you need to understand how you control that descent. Typically you use friction against a rope. Let’s think about it. If you are just falling, then basically, gravity is pulling you to the floor (mathematicians and physicists, please block your ears, hum a happy song and contemplate the word ‘negligible’).
In abseiling, you are attached to the rope somehow and the rope is attached to the top of the cliff/crag/drop. You have some way of increasing or decreasing the friction between you and the rope. Lots of friction means slow or no movement downwards. No friction means gravity will do its thing as if the rope wasn’t there. You want to be somewhere in the middle.
Abseiling Equipment
It is possible to abseil without anything more than a rope. You use friction created by wrapping the rope around your arms or legs – or sometimes both. These techniques are considered emergency abseils because you really don’t want to be using them. If you get stuck and have a rope, it’ll be a safer way of getting down than jumping. ‘The Classic Abseil’, ‘South African’ and ‘Angel Wings’ are all techniques worth looking up, just in case.
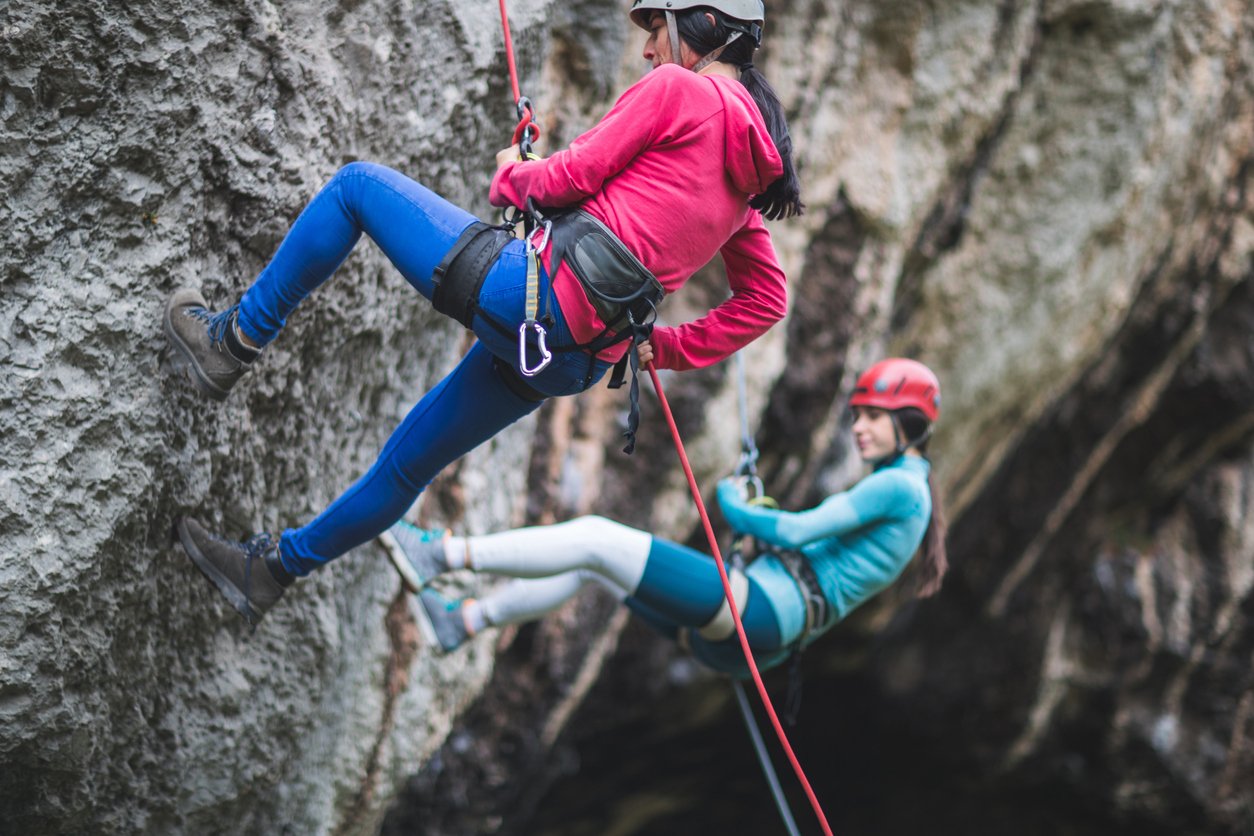
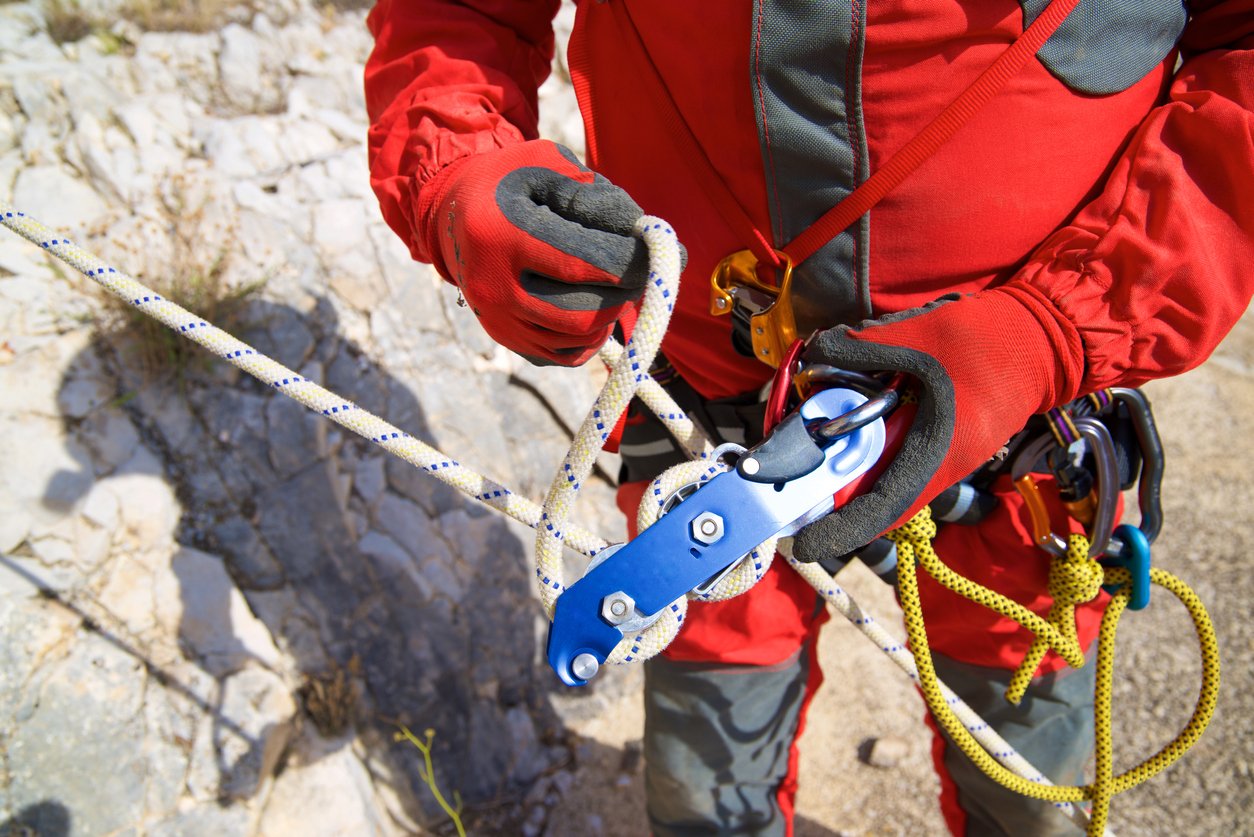
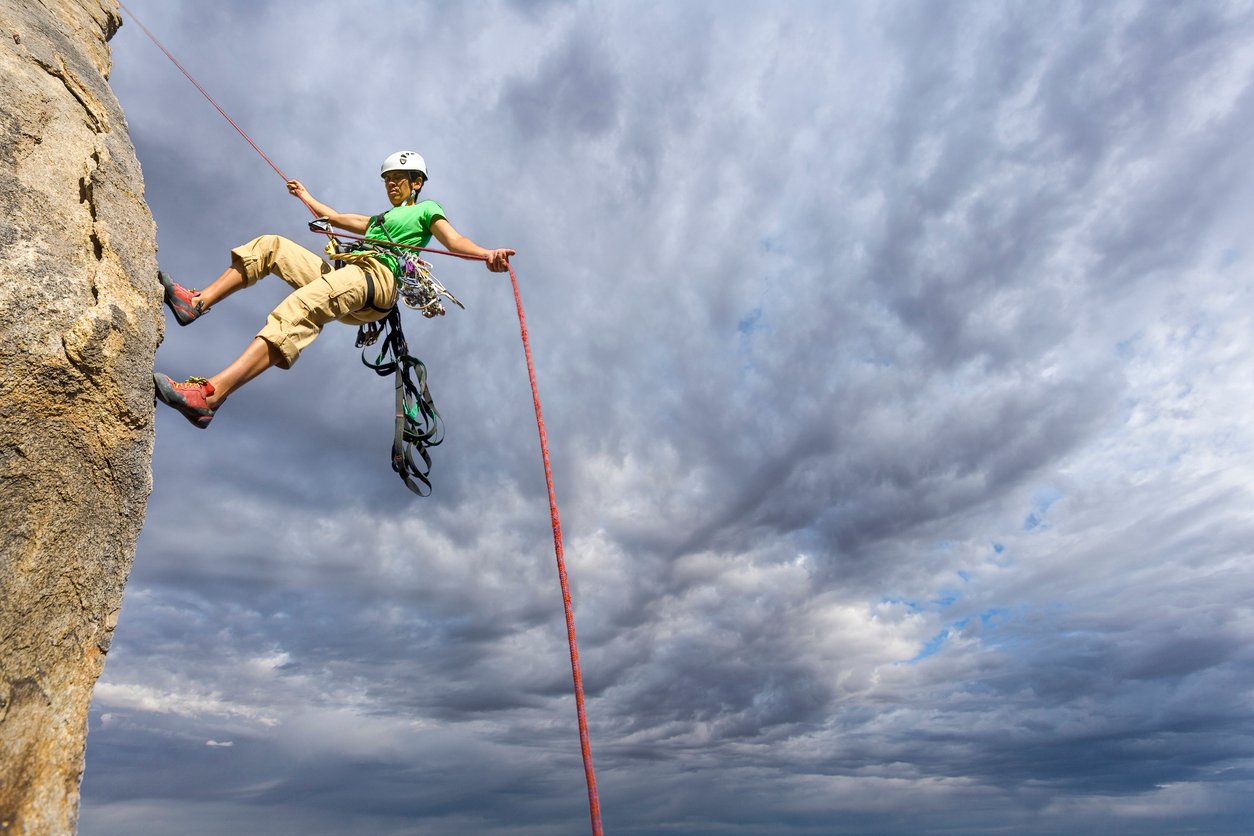
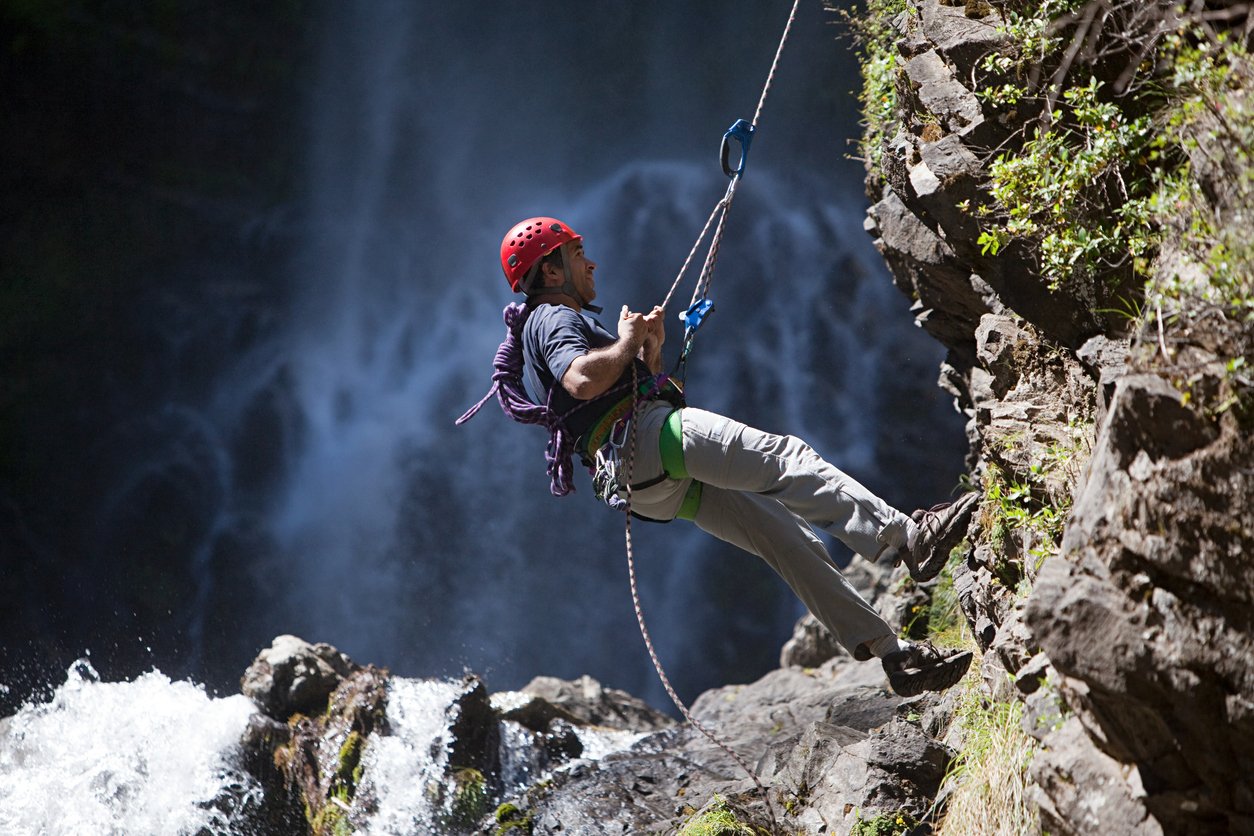
For normal abseiling you need three things: a rope, a climbing harness and something to create friction. Your rope should be exactly like the rope you would use in rock climbing. The same goes for the harness. Now, for the friction, most people use something called a belay device. It’s the same piece of rock climbing gear you use to belay your partner in rock climbing. There is quite a large variety in these belay devices, so it’s probably best to hunt around for one best suited for abseiling.
The emergency services use something called a descender or a GriGri, which allows a very smooth lower and a fail-safe lock, in case someone lets go. With a belay device, if you let go of your grip on the end of a rope that’s been passed through the device, there will be no friction and you are probably going to fall to the bottom. Not good.
Other useful equipment for abseiling include a helmet and gloves. A helmet protects your head from knocking into anything on the way down – or from anything falling on to you from above. Gloves are very useful for long descents if your palms aren’t made of leather. As you descend, the rope will pass through one of your hands. Even if you’re going slowly, there’s potential for serious rope burn. Good gloves will protect your palms.
Abseiling Technique
Okay, you’ve got the basic theory of abseiling and you know the basic equipment you need. Now let’s explain some of the technique to abseiling. Of course, being shown in real life is far easier than written instructions, but we’ll give it a shot.
Start off by putting on your harness, helmet, gloves and attaching your belay device to the gear loop on your harness. You’ll probably need a karabiner for that. Next up, you need to attach your rope to a “good” anchor at the top of the thing you’re about to abseil off. By “good” we mean something that is not going to break off while you’re halfway down the abseil. People use expressions like “unquestionably sound” but you’re probably looking for something like an enormous boulder or big tree – not a frozen Mars bar.
Tie one end of your rope around the anchor you’ve chosen. All solid? Good. Now you want to thread the rope through your belay device. Just how you do that depends on the type of device, so read the instructions. At this point, you should now be connected to the rope via your friction device and your harness. Put your dominant hand on the end of the rope in a place after it has been through the belay device. Typically, that hand will control the level of friction. Holding the rope down and close to your body puts the brakes on, up and away speeds you up. Of course, that depends on your belay device, so check!
Now you’re all ready. You’ve checked your knots and anchors are secure, all gear is properly attached. It’s time to do some abseiling. Face your anchor and walk slowly backwards towards the edge. This is the weird bit. Making sure you’ve got the “brake” on, walk backwards over the edge of the cliff. If you’ve getting everything right, you should be able to slowly walk down the vertical face by finding a sweet spot in the friction: not too much, not too little. Try not to release the brake in sudden bursts, resulting in you bouncing down the face.
As you approach the bottom, put down one foot and then the other. Continue releasing rope until you’re a bit away from the bottom of the face. Then, once you’re safe, un-attach yourself from the rope. Well done – you made it!
Safety and Danger
Human instinct is generally against walking backwards off a cliff edge. There are many ways that your abseil can become more risky and – as we’re sure you can tell! – lots of safety points to take into account. You can make the whole learning experience much safer by having an instructor at the top, by your anchor, holding you on second safety rope. You’re still abseiling, but you’re 100% attached to that second rope, so if something goes wrong, the instructor’s got you.
Here are a couple of common abseiling problems to look out for:
Losing control
At first, it can feel very unnatural to be controlling your descent by braking force with one hand. It’s a bit like when you’re learning to drive, approaching a roundabout and forget that it’s your foot in control of how fast you’re going. If your descent speed starts to get out of control, your mind can panic and make you grab the rope above the belay device. Although this might make you feel better, it’s not going to help at all – and can give you very bad rope burns.
To stop the rope-grab reflex, put your spare hand on the front loop of your harness. That way its got something to cling onto in panic, but doesn’t get in the way of the belay device or your descent. Don’t let go with your controlling hand and remember: you are in control. If you’re starting to panic, you can always put the brake on completely, stop and recompose yourself.
Running out of rope
It sounds very obvious, but you need a longer length of rope to abseil on than the distance between the top and the bottom of the cliff. You also use up more rope tying in to the top anchor and passing it through your belay device. If you haven’t got enough rope to do all this and get to the bottom of the cliff, then you’re going to fall off the bottom of the rope.
In the famous climbing film Free Solo, the most nail-biting part arguably isn’t actually the free soloing – it’s listening to Alex and his girlfriend describe him falling through an abseil on El Cap because she hadn’t noticed the end of the rope. It’s the stuff of nightmares. Luckily, if you make sure you have enough rope, or even tie a stopper knot on the end of the rope, this should never happen to you.

Where can I learn to Abseil?
There are lots of places to learn to abseil in the UK and abroad. A quick search of the internet will find the place closest to you. Luckily for us, the UK is an island, which means a whole coastline of cliffs to lower yourself down. Of course we really recommend that you start much smaller than that – maybe on a grass slope that you’d very happily walk down backwards. It’s really worth getting the technique right before you lean back off the edge of a cliff.
Emergency abseil techniques (the ones that only use a rope) are taught as part of the UK’s Mountain Leader Award. You could do the Mountain Leader Training course, or just a rope work course taught by the same sort of providers. These techniques are also covered in the Mountain Leader textbooks like this one, but nothing beats hands on practice.
Like ropes? Check out our collection of mountain climbing holidays.