

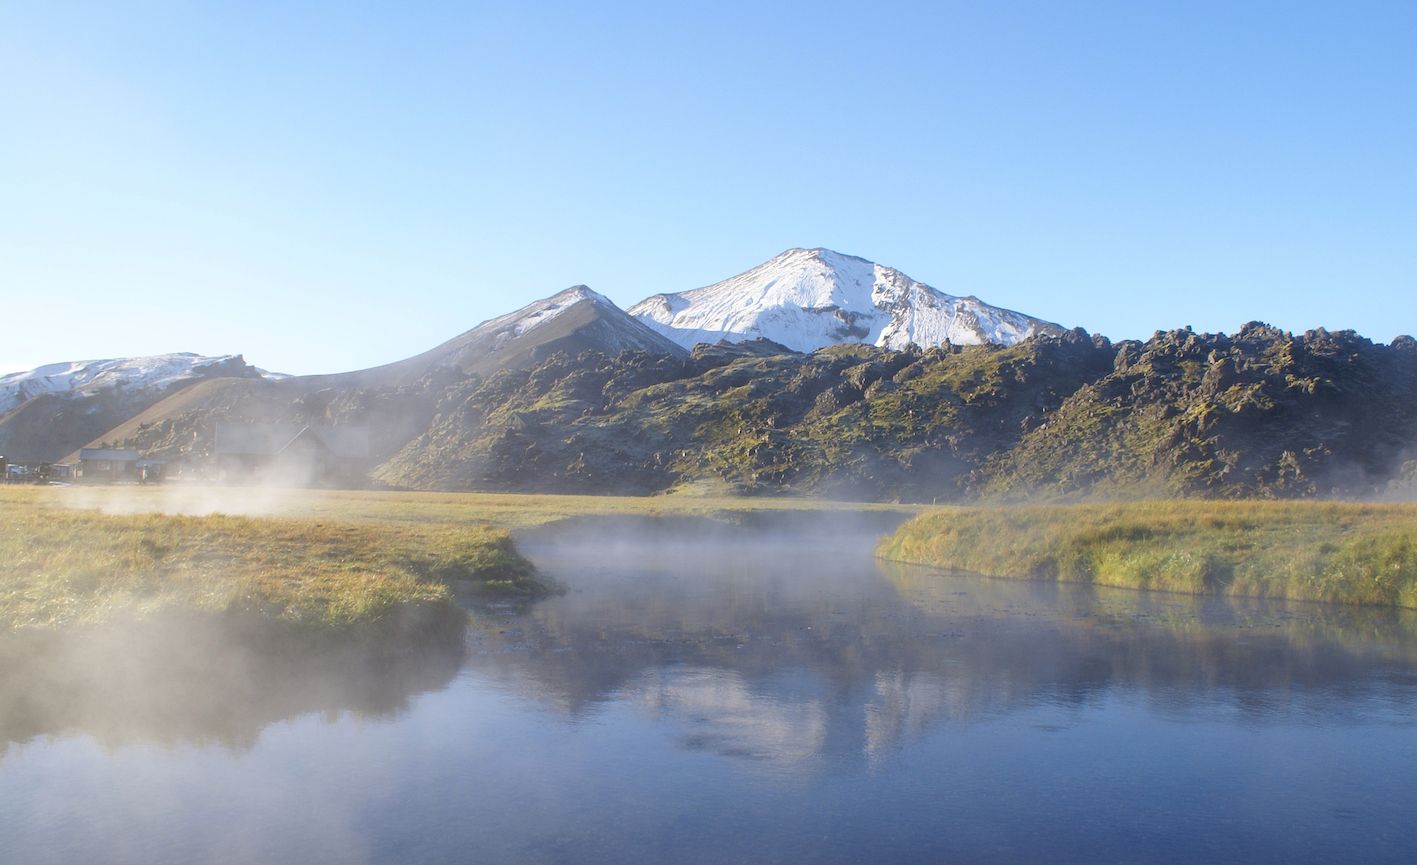
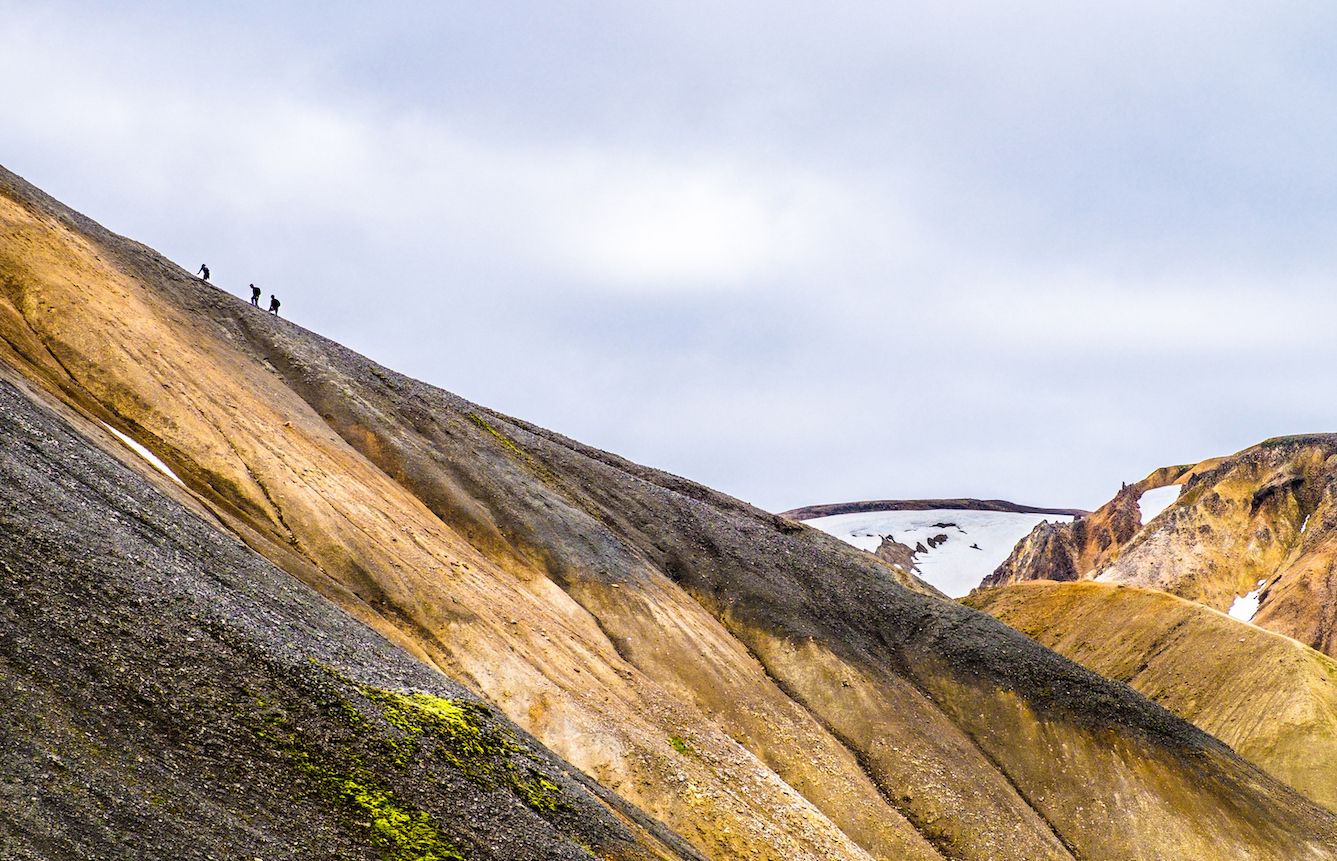
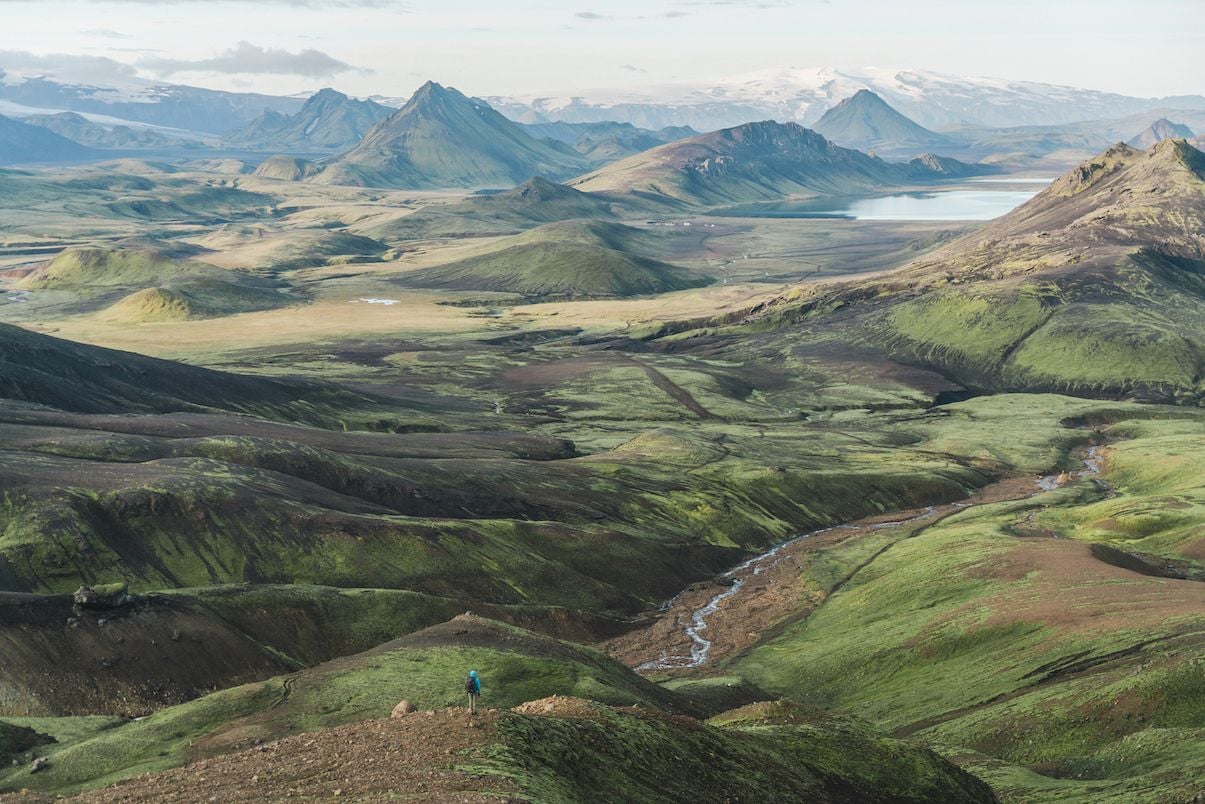
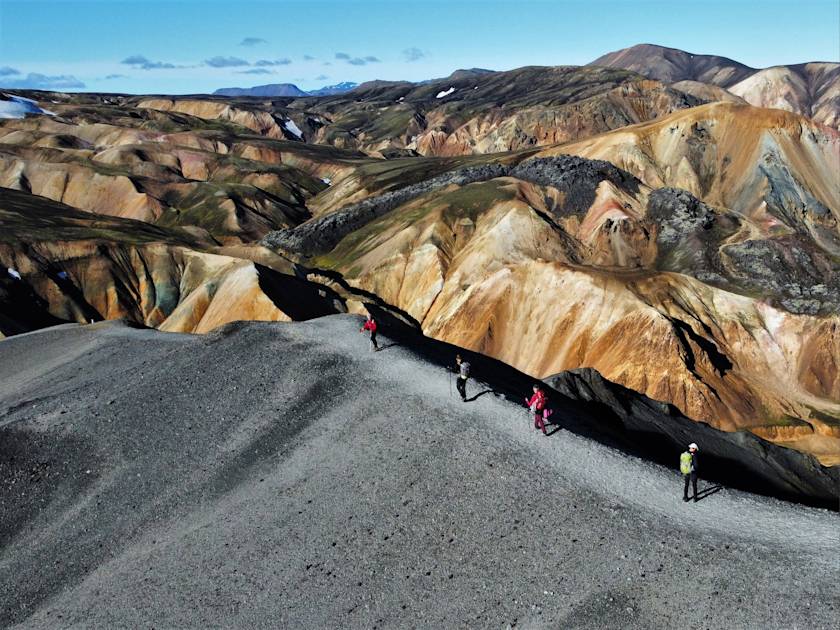
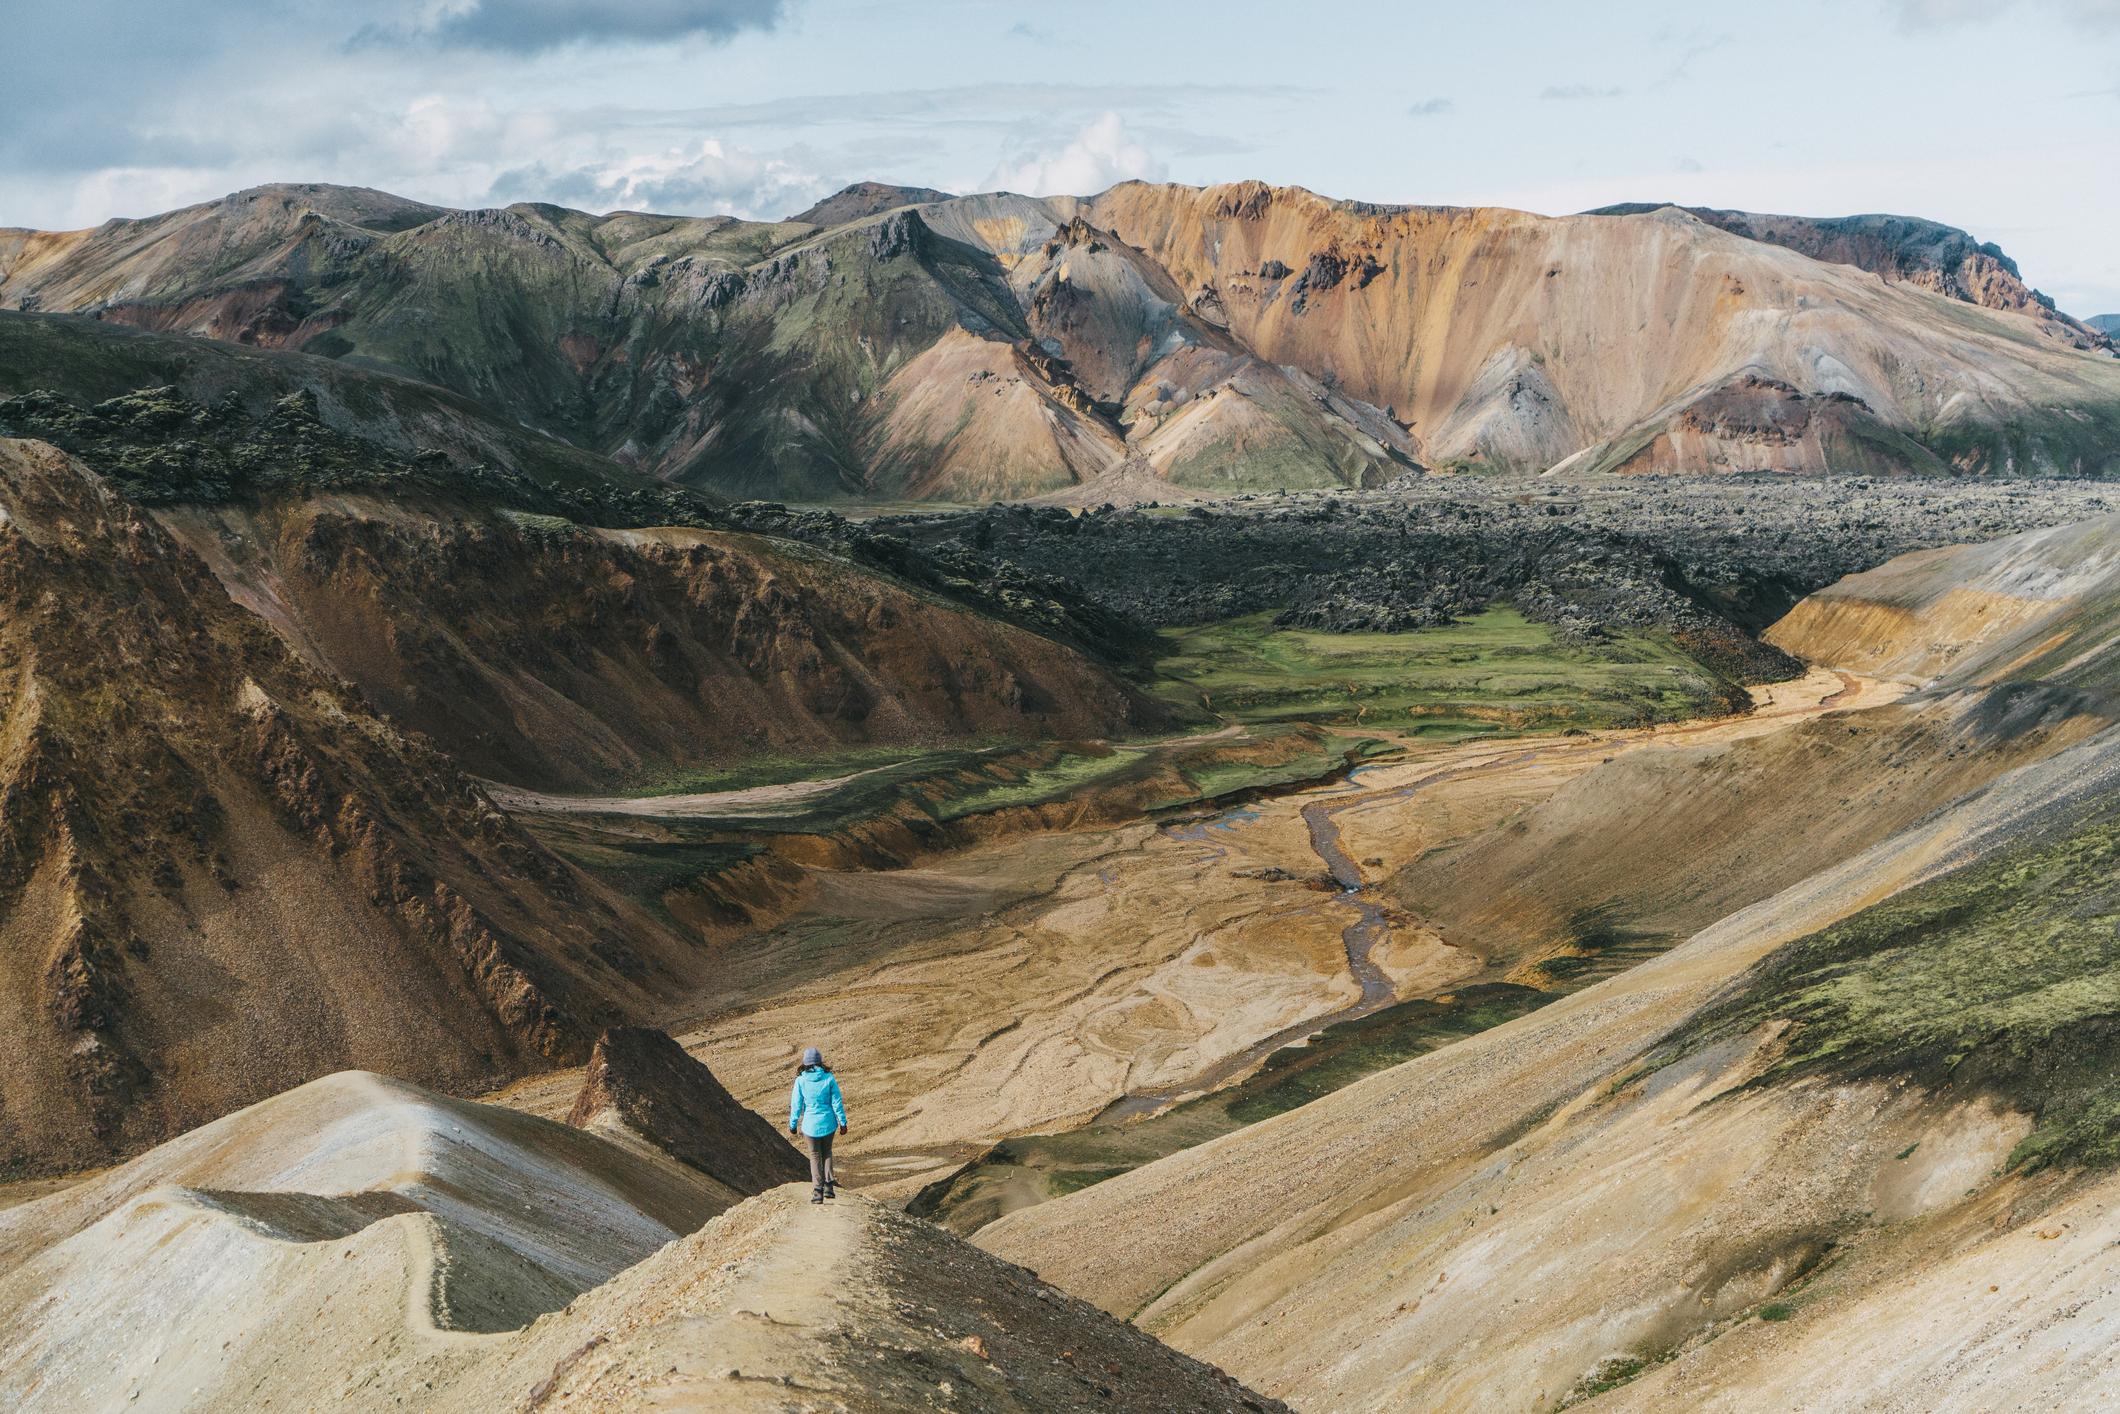
Imagine a 34 mile (54.7km) hiking trail that introduces you to an astonishing diversity of landscapes: colourful rhyolite mountains, thermal pools, glaciers and volcanic slopes carpeted in emerald green moss. That’s Laugavegur, which translates to "hot springs route", and it’s one of Iceland’s most popular multi-day hikes.
Located in Iceland’s Southern Highlands, the trail begins in the colourful, geothermally-active Landmannalaugar Nature Reserve. You’ll ascend the black obsidian slopes of Hrafntinnusker and cross the sparse black ash field of Mælifellssandur. From there you’ll pass into Þórsmörk, ‘The Valley of Thor’, a surprisingly green area nestled between three glaciers.
Most people walk the route from north to south, as the trail slopes slightly downwards in that direction, and this is the order you have to book huts in. However, if you don’t mind camping there’s nothing to stop you from going the other way. You’re likely to encounter fewer people, and you’ll get to enjoy a dip in Landmannalaugar’s thermal pools at the end of the walk rather than the beginning.
You’ll be trudging through the snow, crossing icy rivers, finding your way through thick fog… tempted yet?
The Laugavegur trail is open to hikers from late June to mid September, when the weather is most stable. Even during these summer months you might spend the morning hopefully waiting for the rain to abate before leaving camp. You’ll be trudging through the snow, crossing icy rivers, finding your way through thick fog… tempted yet?
If this sounds like exactly the type of adventurous trek you’re looking for, you can even make it a little bit longer. Add on the Fimmvörðuháls Trail, a 13-mile route which leads from Þórsmörk, across two glaciers, to Skógafoss waterfall in Skógar.
In this guide, we'll discuss the route for this extraordinary hike in greater detail, alongside answering some of the most frequently asked questions about Laugavegur, from accommodation options to logistics.

The Laugavegur Trail: A 4 Day Itinerary
Day 1: Landmannalaugar to Hrafntinnusker
- Distance: 7.4 miles
- Time: 4-5 hours
You can either arrive at Landmannalaugar the day before and camp at the trailhead, or catch the early bus out of Reykjavik and get on the road. We’d recommend the former, if you have the time to do so.
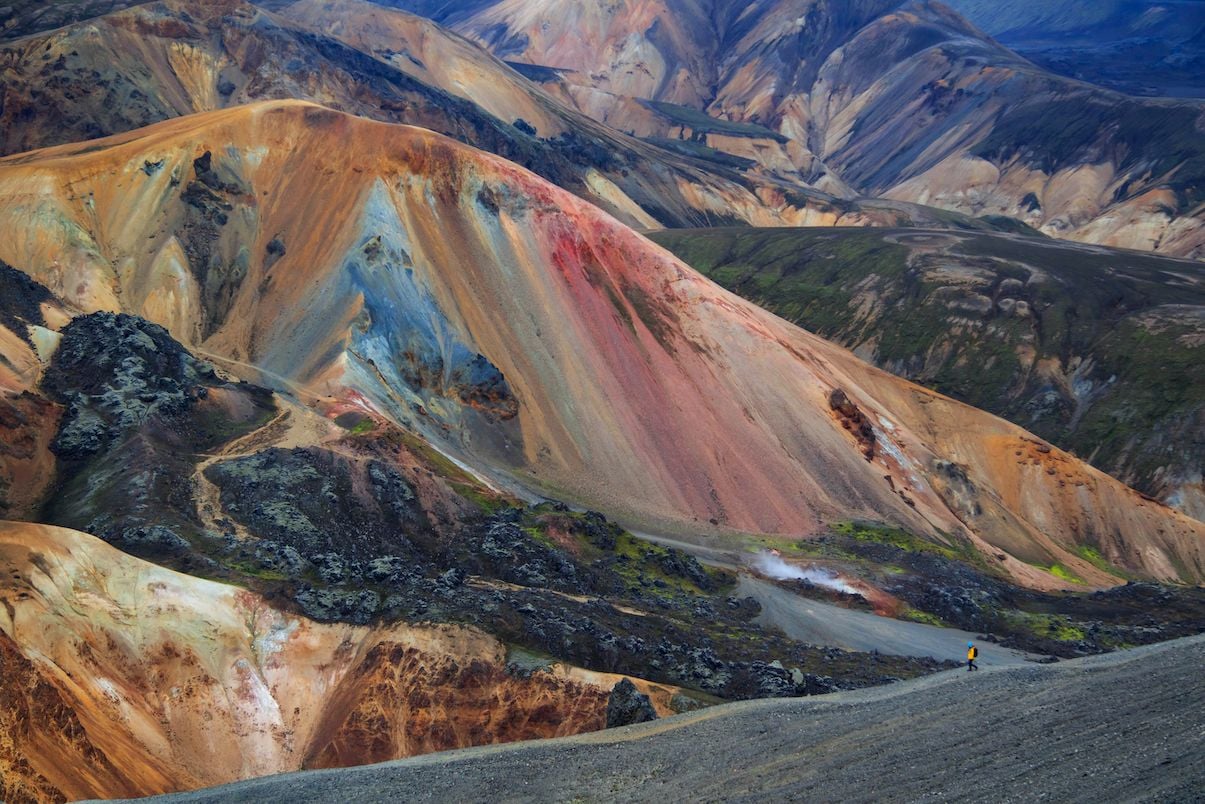
The camp is located in the colourful volcanic hills of Fjallabak Nature Reserve, where there are plenty of short hikes to get you warmed up. Speaking of warming up, there are some geothermal hot springs which you can bathe in. The campsite at Landmannalaugar also has a charcoal grill, so you can kick off your adventure with a barbecue.
Once you’re ready to strike out, you’ll start off by climbing a waymarked path up to the lava field of Laugahraun. The path is steep and strenuous, especially when covered in snow, but it soon levels out.
The lava field consists of dark basalt, ossified into strange formations and dotted with green moss. As you walk, you’ll see evidence of geothermal activity, including steam rising from vents in the ground, and puddles of bubbling mud.
Craggy volcanic mountains loom up on either side. You’ll head downhill to a plateau, just below the mountain of Brennisteinsalda (also known as the ‘Sulphur Wave’). This is a great spot for a snack break; take in the view of the multicoloured rhyolite mountains and gorges.
Continue on uphill to Stórihver, a green valley where a geyser pumps out steam across the landscape. We’d recommend a rest here, as the final part of the hike - to the hut in Hrafntinnusker - involves another elevation gain.
The scenery changes significantly as you walk; the colourful, undulating hills are replaced with stark black volcanic slopes. The higher peaks are striated with snow all year round; the temperature drops significantly as you make your way through slushy patches of snow. As you cross the slope of Söðull, you’ll find a sobering memorial to a former trekker.
“In loving memory of Ido Keinan, who passed away in a blizzard so close to the safe hut nearby yet so far at only 25 years old,” reads a metal plaque drilled into a basalt cairn.
Keep climbing up the bare obsidian mountainside until you reach the Hrafntinnusker hut. Located at an elevation of 1110m, it’s the highest point on the trail, surrounded by snow and dark mountains streaked with ice.
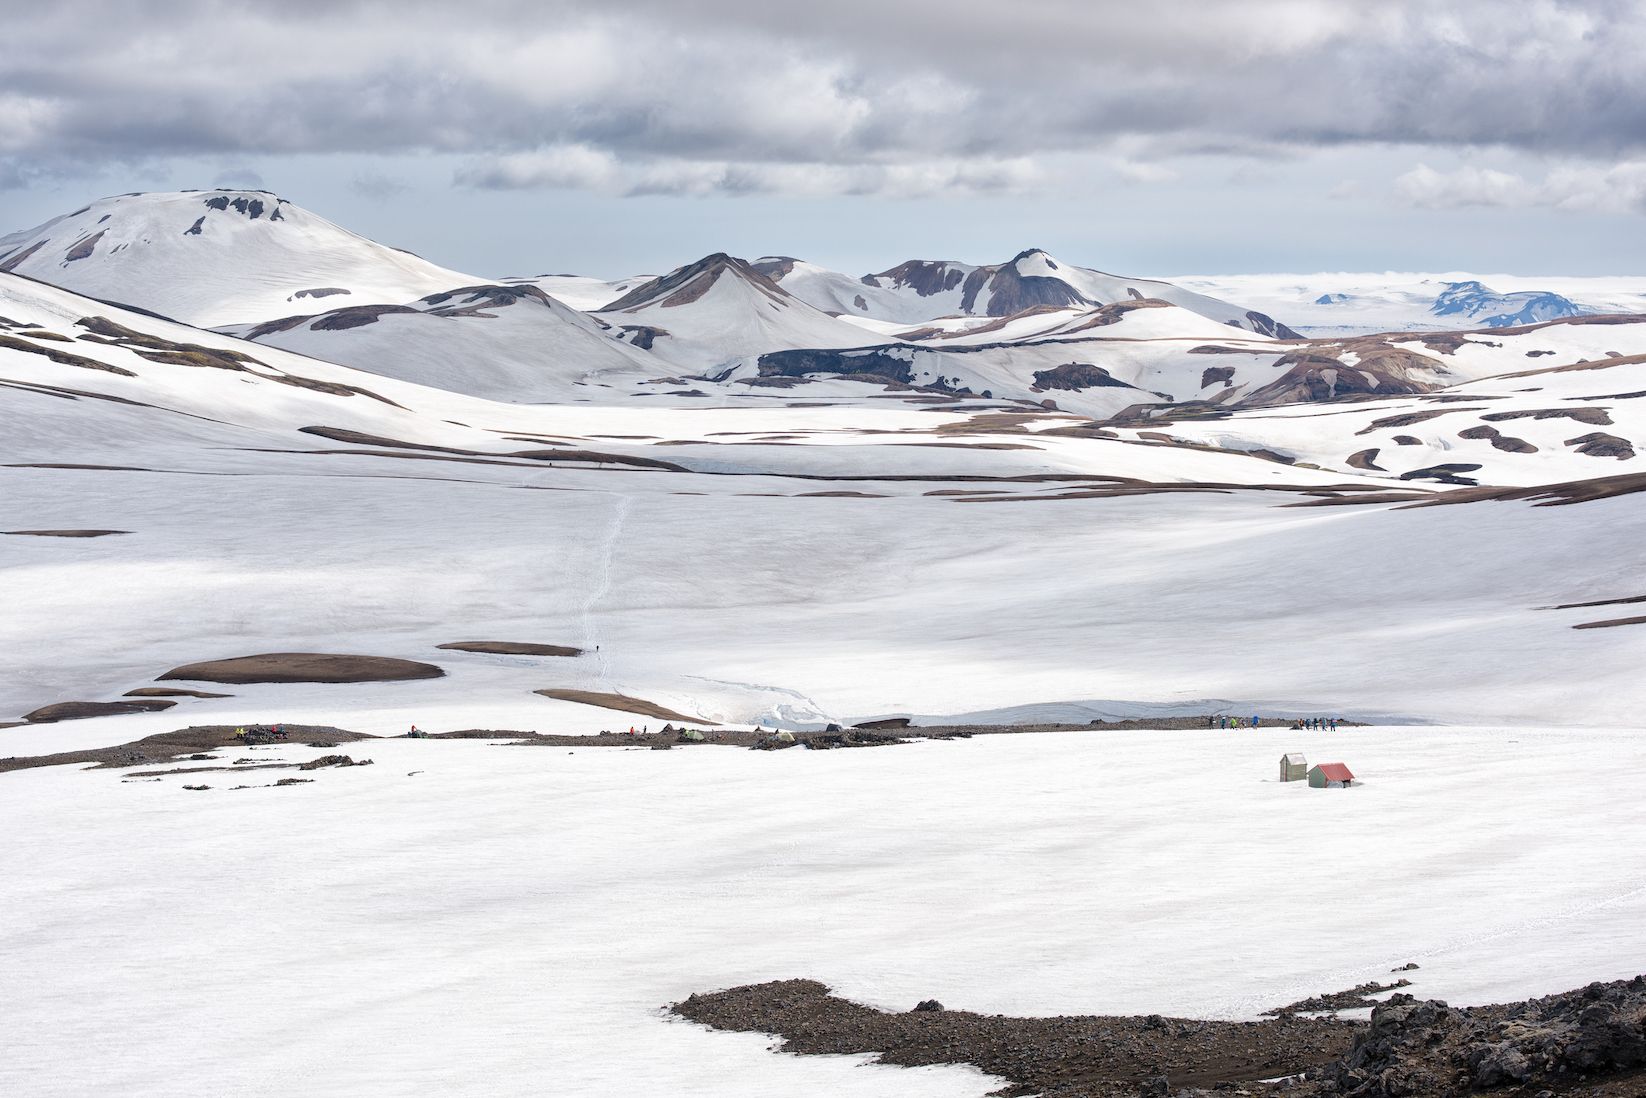
The campsite is on a bare, obsidian slope, consisting of a few horseshoe shaped windbreaks created from the volcanic rock. This was one of the nights where we camped, and we can tell you from bitter experience that it was really rather cold!
For this reason, some hikers choose to continue onto the next campsite, which is better equipped and less exposed. However, if you do that you’ll be looking at a further four to five hours of hiking, which is a lot when you’re carrying a heavy rucksack!
Day 2: Hrafntinnusker to Álftavatn
- Distance: 7.4 miles
- Time: 4-5 hours
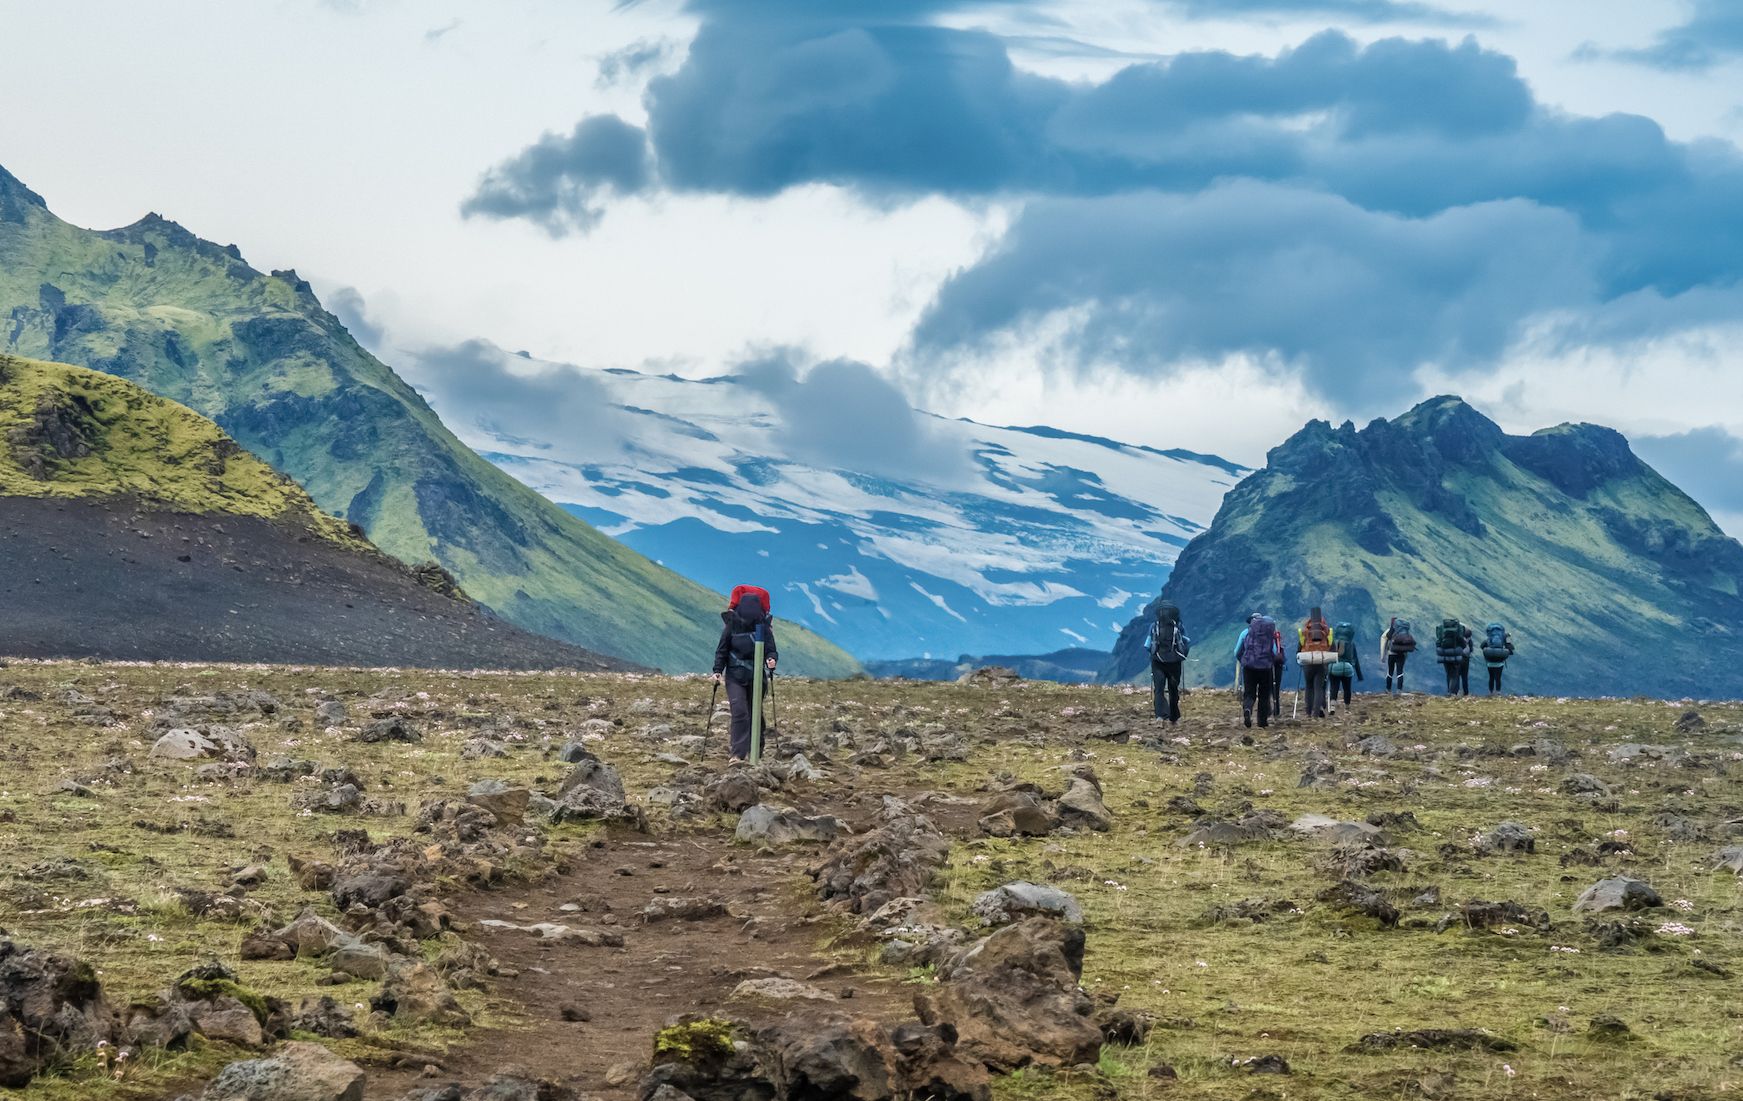
You’ll be able to see the trail that leads away from the campsite towards Álftavatn (and the hikers walking ahead of you). It leads across patches of snow and bare rock, curving over rolling basalt hills as it passes below Reykjafjoll Mountain. Although the terrain is relatively flat here, do tread carefully - there are several ravines covered with snow bridges.
The path meanders towards the west of Kaldaklofsfjöll, and there’s a short but relatively steep climb up to the plateau of Jökultungur, where you’re treated to an impressive view of the varied terrain you’ve hiked across, and the three surrounding glaciers: Tindfjallajökull, Eyjafjallajökull and Mýrdalsjökull. Well, unless it’s obscured by clouds!
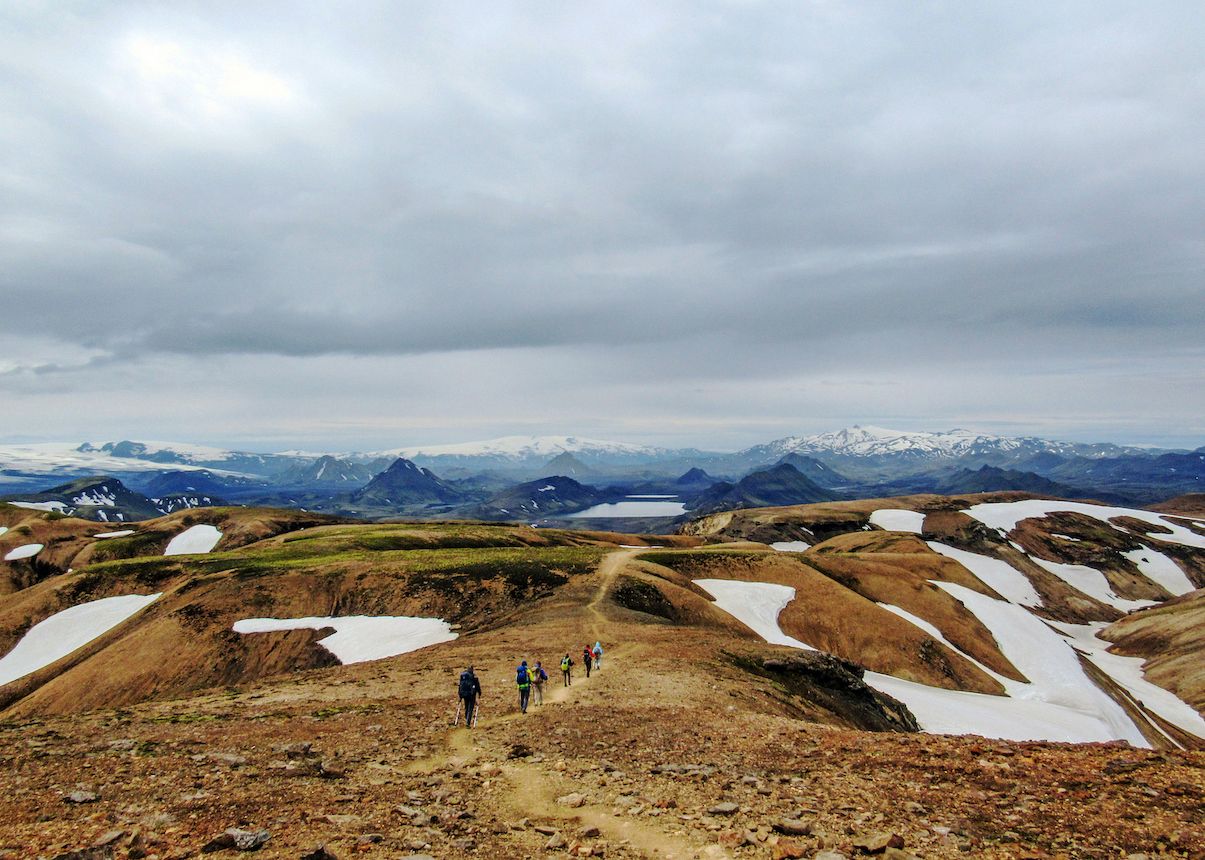
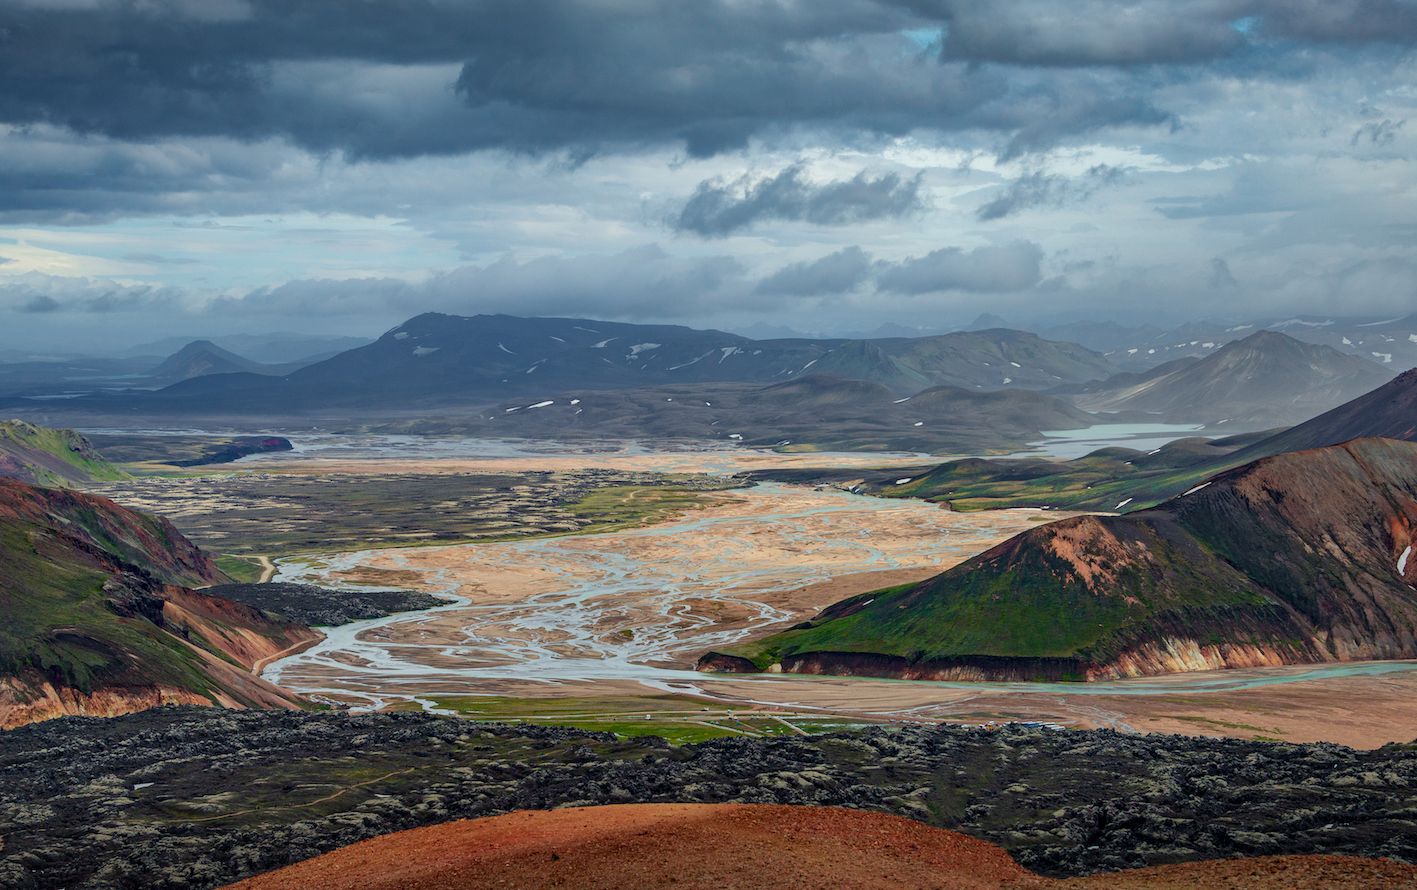
As you walk across Jökultungur, you’ll see the Álftavatn Valley spread out below you. The terrain has changed again - Lake Álftavatn, with its gleaming gun-metal grey waters, is encircled by conical volcanic peaks carpeted in lime green moss. Rivers run through the green floor of the valley like silver threads. On a clear day, you should be able to see the faint blue and white silhouettes of the ice caps on the horizon.
There’s a rocky, slightly steep descent into the valley. From there, it’s a flat walk across the valley floor, which is carpeted with moss and grass. You’ll need to cross the Grashagakvísl river to continue along the path.
In some weather, you can do this via a snow bridge - otherwise you’ll have to put on your waterproof shoes, roll up your trousers and wade across. The water is (literally) glacial! According to FÍ, the water is drinkable (but we’d always recommend purifying it).
The hut and campsite are located on flat land near Lake Álftavatn. The words ‘Restaurant’ and ‘Bar’ are painted on the side - a can of beer is definitely in order. This campsite has better amenities than the previous one, including hot showers (which you’ll need to pay an extra fee for).
Day 3: Álftavatn to Emstrur
- Distance: 10 miles
- Time: 6-7 hours
Follow the trail in an easterly direction across the valley. After around 20 minutes of hiking you’ll need to cross the Bratthálskvísl river. It’s deeper and faster flowing than yesterday’s, especially after heavy rain. You’ll walk along Brattháls ridge on the way to Hvanngil, a green and volcanic valley where a further set of trekking huts are located (a useful toilet stop).
After Hvanngil, you’ll cross the Kaldaklofskvísl river via footbridge, and a short while later, it’s another cold crossing of the Bláfjallakvísl river. Your fourth and final crossing of the day is the Innri Emstruá river, using a wooden footbridge.
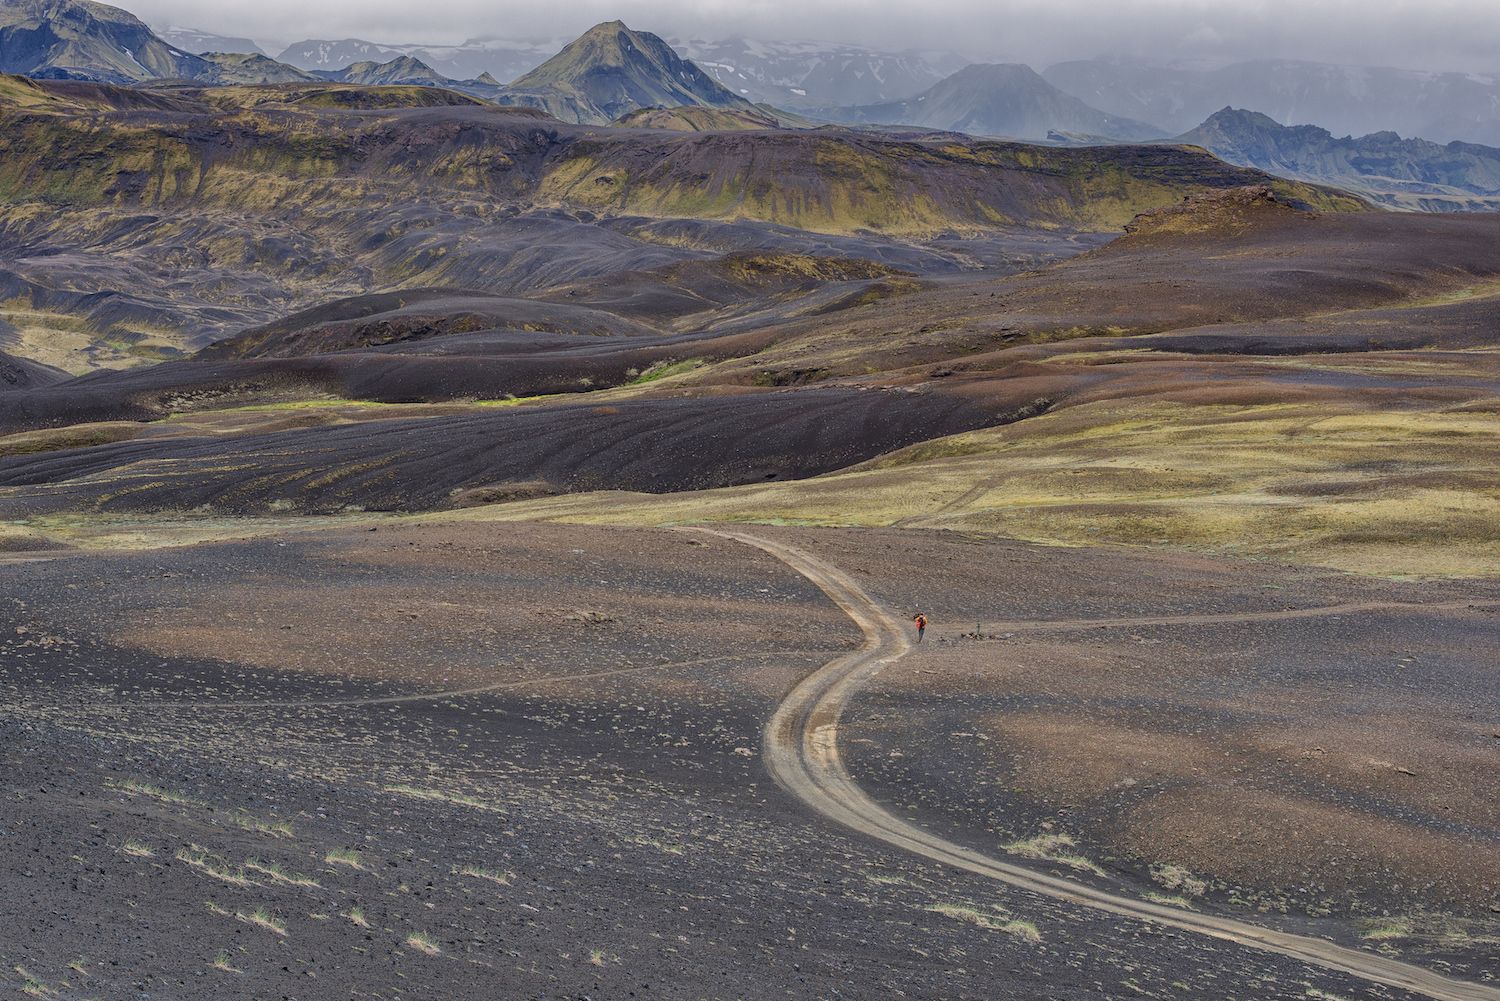
As you continue south towards Emstrur, the green valley is replaced by the sparse volcanic desert of Mælifellssandur. The black sand is littered with pumice boulders, and is almost entirely devoid of vegetation. After you’ve been walking for around an hour, you’ll begin to descend into a small valley, where you’ll catch sight of the huts.
Day 4: Emstrur to Þórsmörk
- Distance: 9 miles
- Time: 6-7 hours
Head east on the trail across the volcanic landscape. The path descends down to the Syðri-Emstruá river, which runs through a deep canyon (don’t worry, there’s a footbridge for this one). You’ll climb back up on the other side, to a higher plateau above the gorge.
If you walk out (carefully) towards its edge, you’ll be able to see the deep gorge where the Syðri-Emstruá and Markarfljót rivers meet. They’re fast-flowing rivers which are fed by the meltwater running off the Mýrdalsjökull and Eyjafjallajökull glaciers.
Hike south through the hills of Almenningar. You’ll cross two small ravines, Slyppugil and Bjórgil, both of which have creeks with drinkable water. Once you’ve left the ravines behind, you’ll see that the landscape begins to get greener.
You’ll soon reach the final steep climb of the day, up to the bare summit of Kápa. And shortly after that, your final river crossing, over the gravel outwash plain of the Þröngá. It might not be steep, but the ground is rocky.
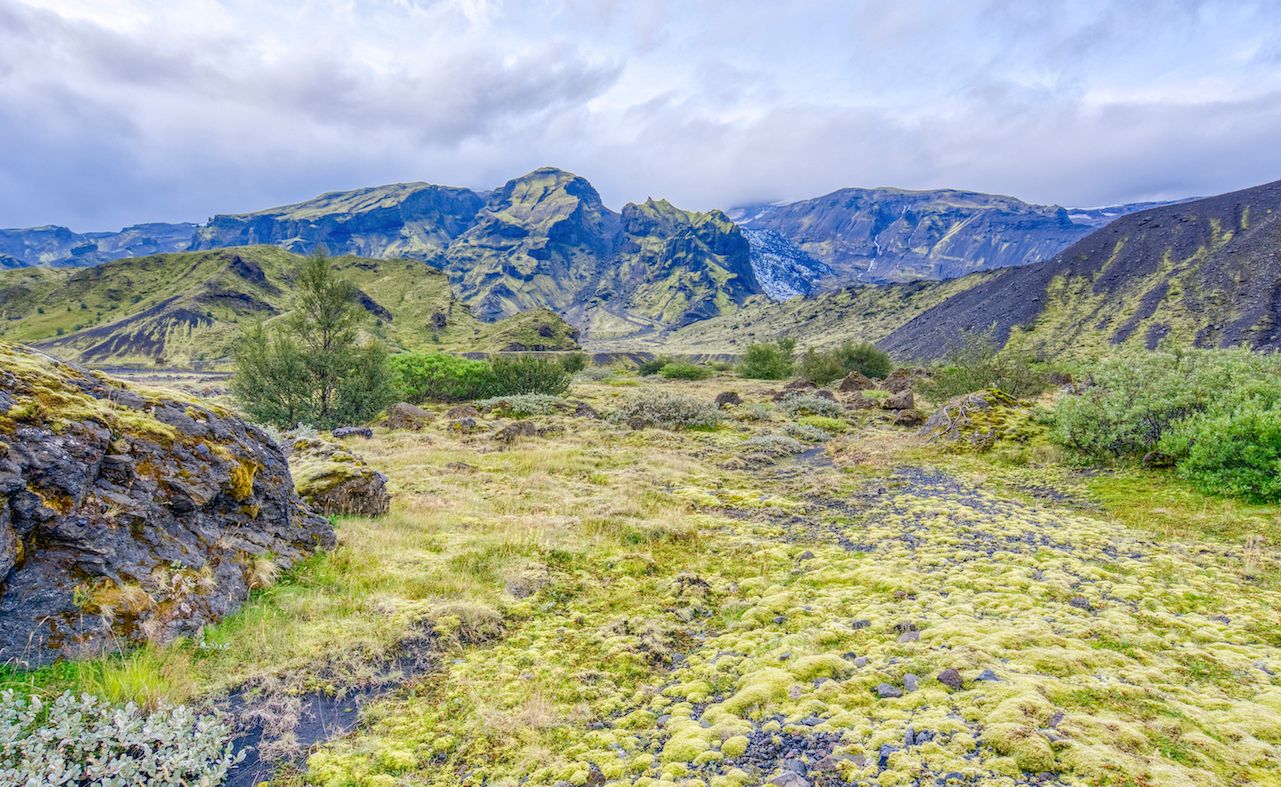
You’ve now crossed over into Þórsmörk, which translates to ‘Thor’s Valley’. It’s the greenest part of the walk - you’ll even hike through your first woodland of the trip, Hamraskógar, where you’ll find dainty, stunted trees and a carpet of wild herbs and flowers. Descend down through the wooded valley for around half an hour, until you reach the end of the trail.
There are a few accommodation options available, if you aren’t planning on going back to Reykjavik straight away. The most popular is the hut and campsite at Langidalur. But if you’re adding on the Fimmvörðuháls trail to your trek, it’s worth continuing on - you’ll find the small Baldvinsskáli hut around 2.5 miles along the route.
If you’ve finished the walk, and want to treat yourself, we recommend the more upmarket private accommodation, Volcano Huts. There’s a sauna and hot pool, plus a restaurant serving up a hearty dinner buffet.
Accommodation Along the Laugavegur Trail

There are two accommodation options along the Laugavegur trail - to stay in one of six huts, or their adjacent campsites. Both of these are owned and maintained by FÍ (the Icelandic Touring Association). Wild camping is not permitted.
The huts are located in Landmannalaugar, Hrafntinnusker, Álftavatn, Hvanngil, Emstrur and Þórsmörk. Each varies in size and comfort, but all offer a mattress to sleep on, toilets, cold running water and a communal kitchen where you can cook your evening meal. They’re all heated by gas or geothermal energy, but there's no electricity (so you won't be able to charge your devices). Make sure to book them in advance - they fill up several months ahead of time.
Camping will give you more privacy and more immersion in Icelandic nature, but your four walls will be made from canvas not wood. However, if you decide to camp at one of the adjacent sites, you’ll have access to the bathroom facilities (but not to any of the indoor space or cooking facilities).
On a small group camping trip, your host will provide you with a communal 'mess tent' for eating and relaxing in, and strong expedition tents suitable for the unpredictable Icelandic weather. If you're travelling independently and carrying everything you need with you, then you'll need to make sure your tent is suitably lightweight.
Cost is also a factor. Camping currently costs between 2,200kr - 2,300 kr (£13 - £14) while huts are 13,000 kr (£77) when travelling independently. Hot showers cost 900 kr (£5), for both hut and camping guests. So you might be surprised to see that small group camping expeditions along Laugavegur are a similar price to the hut-to-hut trek. This is because the former includes the cost of luggage transfer, so you don't have to carry all your equipment on your back - hut-to-hut trekkers will hike with everything they need, while campers just have a daypack.
Kit For Hiking the Laugavegur Trail
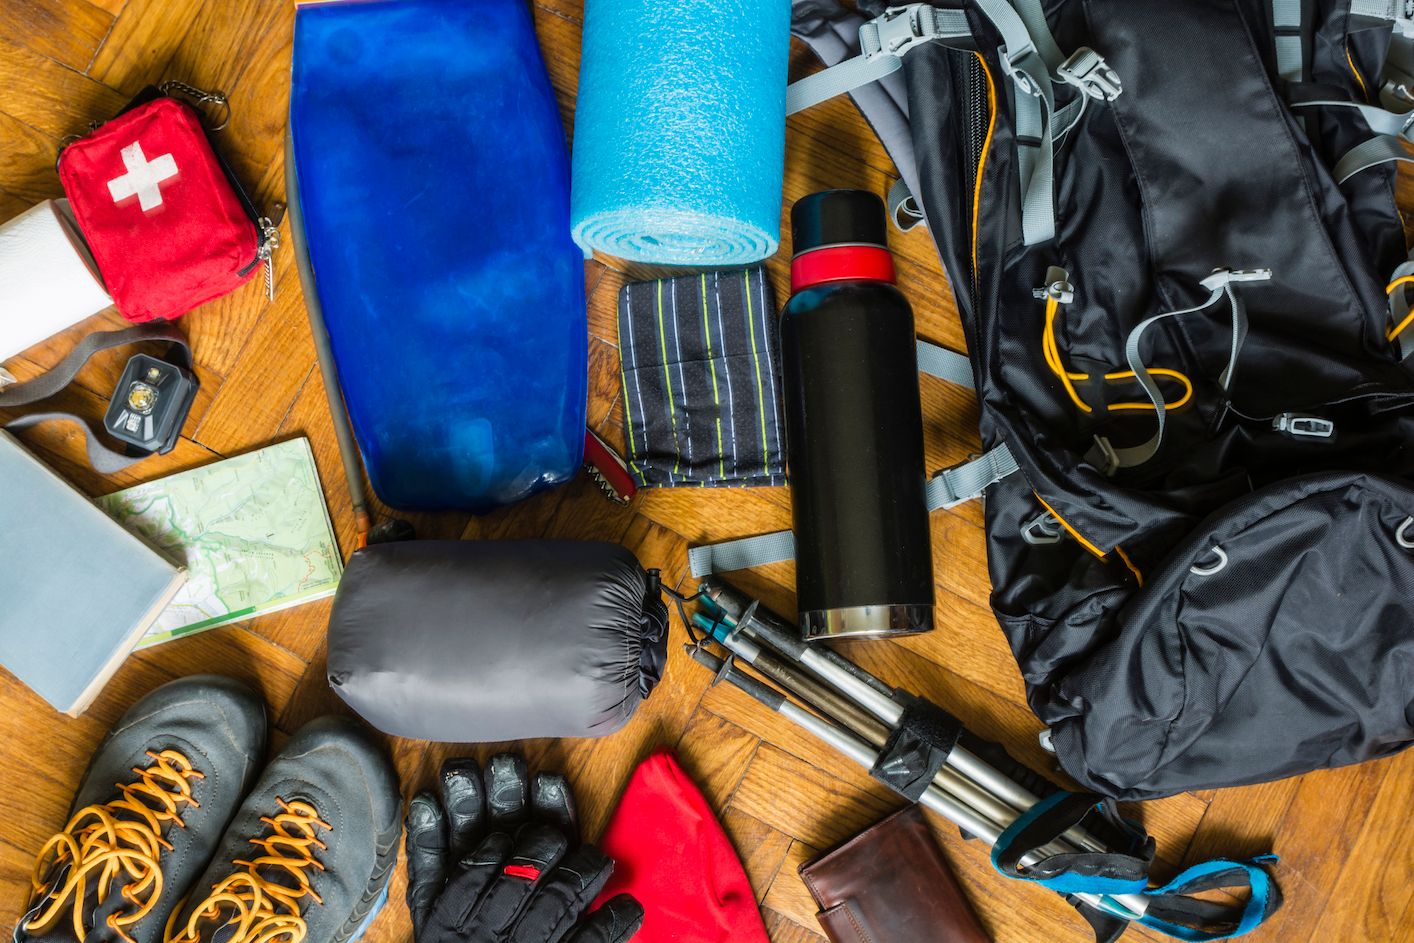
When hiking the Laugavegur Trail, we recommend coming prepared for the weather with the following gear:
- Hiking boots (worn-in, waterproof and with ankle support)
- Long-sleeved thermal tops / breathable wicking layers (wool or synthetic)
- Fleece jacket or similar
- Lightweight hiking trousers/shorts
- Waterproof jacket with hood (windproof and breathable, e.g. Gore-Tex or similar)
- Waterproof trousers
- Gaiters (optional but recommended for June/early July departures)
- Lightweight down/synthetic fill jacket
- Lightweight gloves (wool or synthetic)
- Hiking socks (2-3 pairs, wool or synthetic)
- Swimwear (for thermal pools)
- Sunglasses
- Sunhat
- Something to sleep in
- Sandals/beach shoes/old trainers for crossing rivers, and a pair or neoprene socks
- Clothes and shoes/sandals for the evenings in the huts
What camping gear you’ll need depends very much on whether you’re camping or staying in the huts, if you’re travelling independently or in a group. If you’re camping independently you’ll need:
- An expedition tent
- A camping mattress (such as Thermarest)
- A lightweight sleeping bag, 3-4 season with a comfort rating up to -5°C
- Cooking equipment and utensils - a stove, a cooking pot, gas and utensils.
 Emily Woodhouse
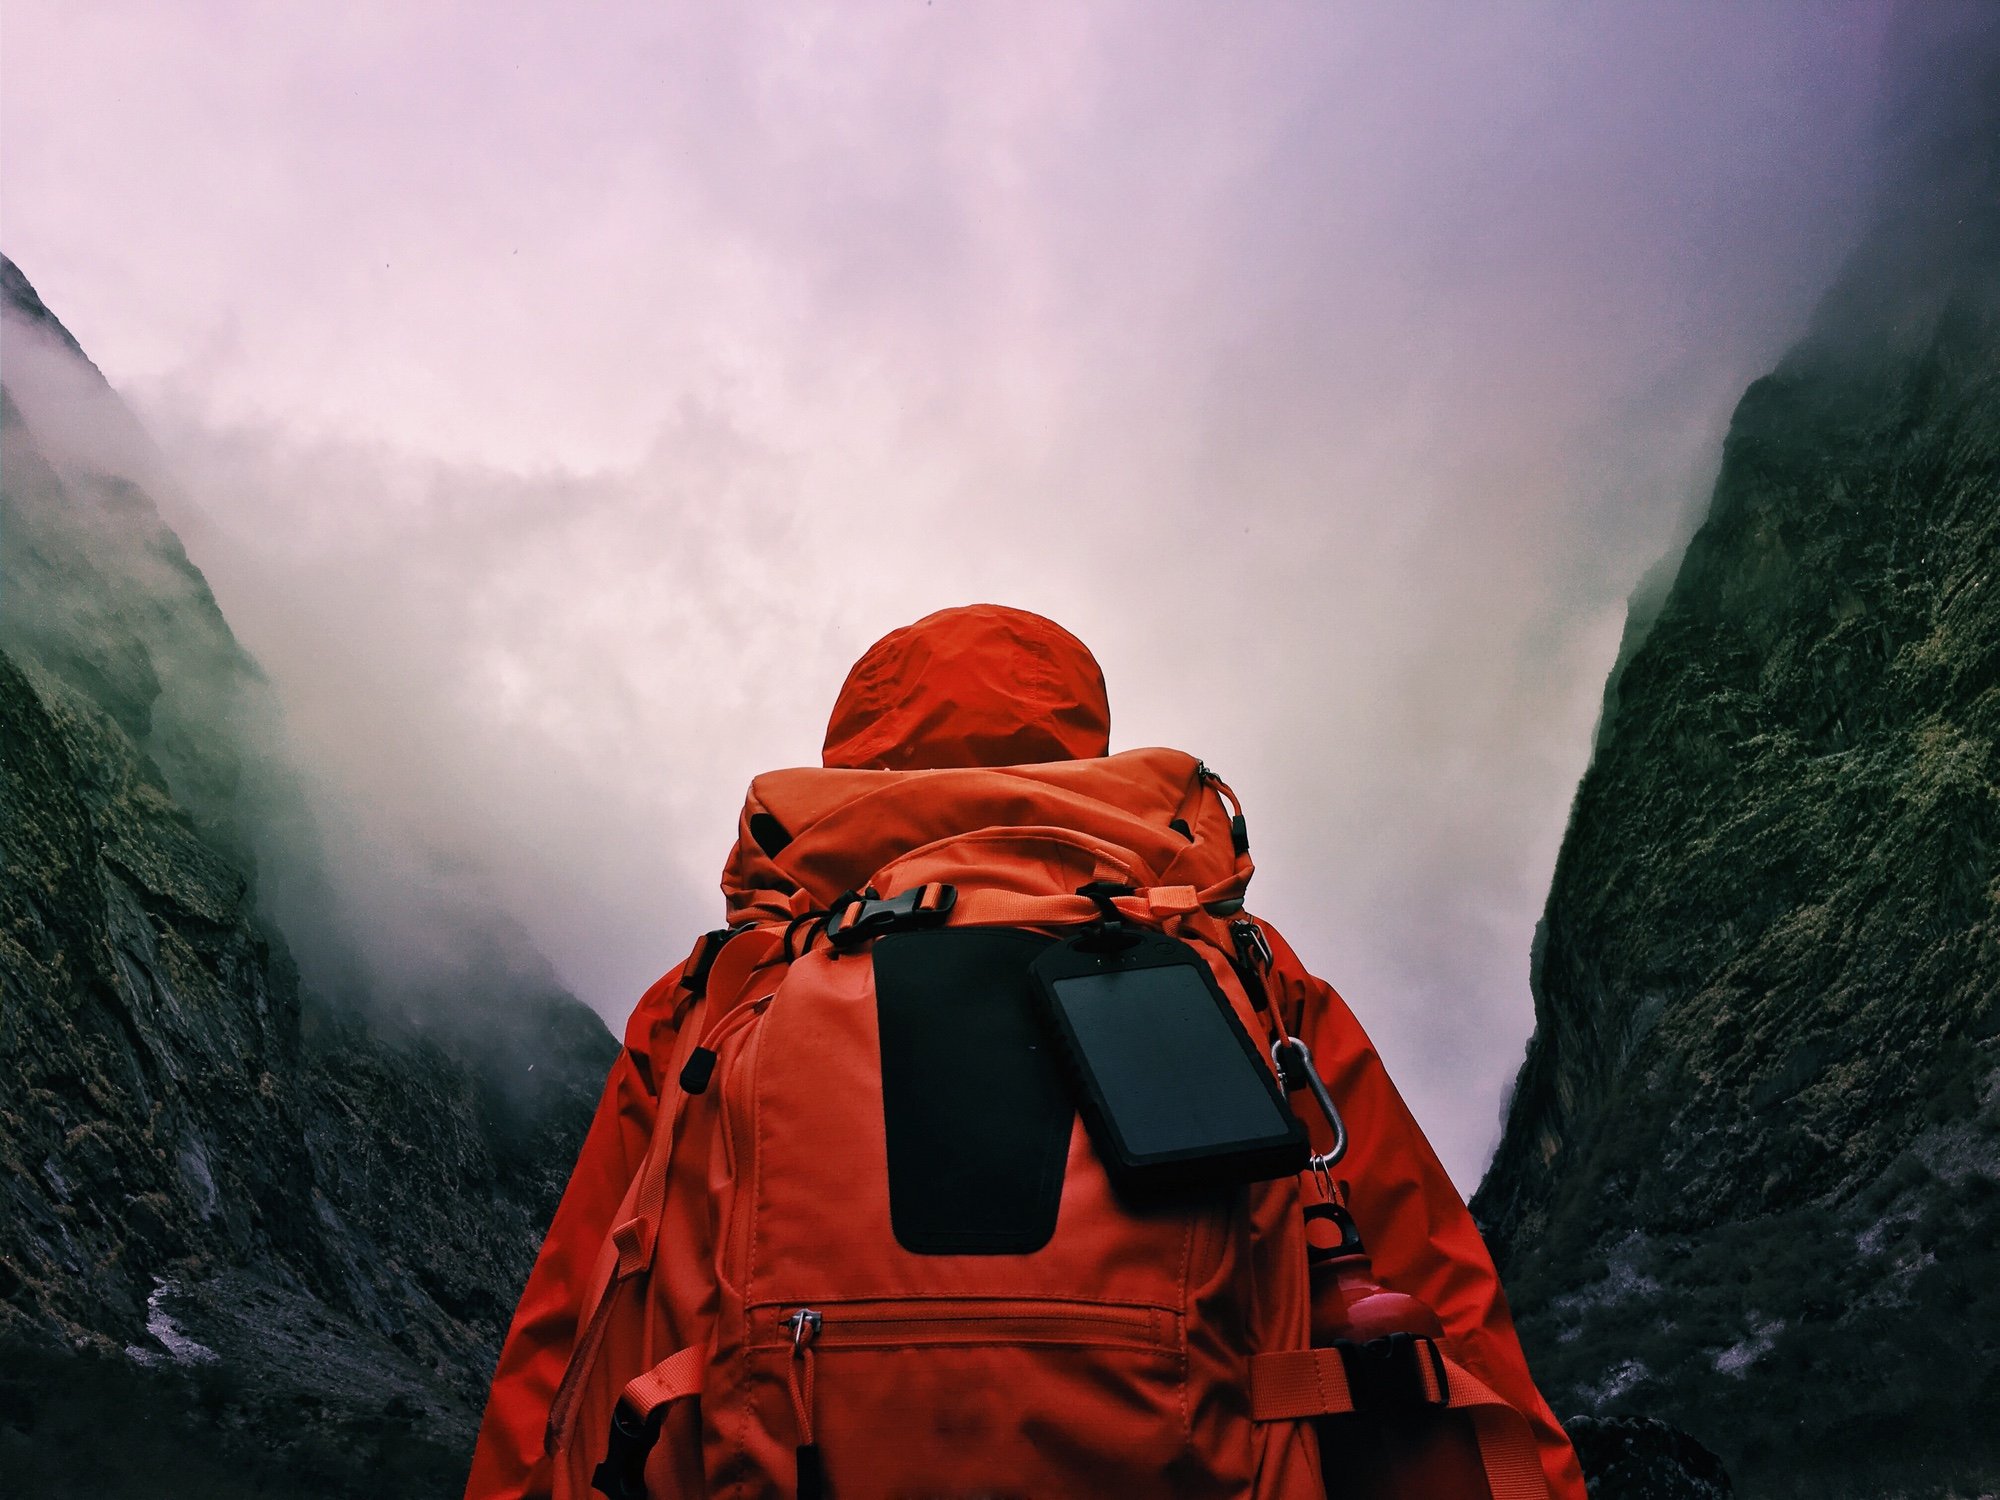
Travelling independently means you’ll need to carry your own food with you. This includes meals and other hiking snacks .
Even though the trail is clearly waymarked, make sure you bring a map. When fog, rain or snow descends on the mountains, visibility is significantly reduced
The huts do have a limited selection of food, drink and snacks for sale, alongside other products you might need (including plasters, power banks and camping gas). However, products do sell out, so it’s best not to rely on them for your daily calorie intake!
Even though the trail is clearly waymarked, independent trekkers should bring a map. When fog, rain or snow descends on the mountains, visibility is significantly reduced.
For a full packing list, check out the 'kit list' section of our Trek the Laugavegur Trail in Iceland: the Camping Edition.
FAQs About Laugavegur
In this section, we answer some of the most common questions about Iceland's most popular hiking trail, from difficulty level to logistics.
When to Hike Laugavegur?
Due to the unpredictable weather in the region, the Laugavegur trail is only open from late June to mid September. The exact dates are dependent on the weather, and also on Iceland’s Road Authority. The trailhead, and some of the huts along the route, are accessed by gravel F-roads (roads that access the highlands of Iceland), which are closed during the winter months when conditions are too dangerous for driving.
It’s for this reason that most hikers will plan a trip between July and August. Attempting it earlier or later than this means you run the risk of not being able to access the trail at all. However, you will encounter fewer hikers on your journey.
Is it Possible to Hike the Laugavegur Trail Independently?
Yes, the Laugavegur trail can be hiked independently. Do be aware that if you do this, however, you'll need to carry everything you need for four days on the trail - including food - so we would only recommend experienced hikers attempt this.
How Long Does it Take to Hike the Laugavegur Trail?
The vast majority of hikers hike the trail over four days, hiking between seven to 10 miles a day (11-16km). Hiking the trail over four days gives you time to enjoy the scenery and also avoid patches of bad weather.
How Difficult is the Laugavegur Trail?
The Laugavegur trek is not long at 34 miles (54.7km), but it is a relatively challenging multi-day hike. You'll be hiking for around five to seven hours a day and there are some steep climbs to contend with, alongside daily river crossings (water level varies across the season).
Considering the route is entirely off-road, you’ll need to carry all your food and other supplies with you - especially if you're travelling independently - which makes it harder. However, anyone with a good level of physical fitness should be able to complete the hike without difficulty.
How Many People Hike the Laugavegur Trail?
Between 75,000 and 100,000 people hike the Laugavegur trail each year. The majority of hikers do so between the peak months of July and August. Come earlier or later in the season (June or September) and you'll find the route less crowded.
How to get to Laugavegur?
Reach the Laugavegur Trail by taking a bus from Reykjavik to Landmannalaugar, the trail’s northern start point. Scheduled highland buses operate during summer by companies such as Trex, connecting Reykjavik with key trailheads like Þórsmörk and Landmannalaugar. Transport to and from trailheads is provided on guided trips.
Read More
- What I Wish I Knew Before Visiting Iceland
- Iceland Solo Travel: the Ultimate Guide
- 10 Adventurous Things to Do in Iceland
Inspired? Check out our hut-to-hut Laugavegur trek and our Laugavegur camping trip? Or have a browse of our other Iceland hiking trips.